Mapiddiction lets you add your own custom image that overlays on top of Google Maps satellite or street maps.
Your users can pan and zoom around the map as normal, and will see the underlying google map (either street or satellite view) when they pan to the edges or zoom right out. Your image can follow your colour scheme or style guide, to ensure it reinforces your brand. It can highlight sections or terrain features relevant to your map users. If can also include temporary or event specific features such as perimeter fencing, temporary car parking, or event zones like food and drink or carnival ride areas.
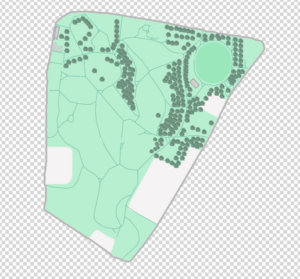
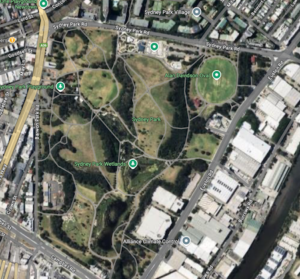
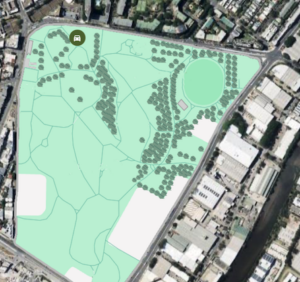
Overview:
Typically, the image file used for a custom maps will:
- Be less than about 1 or 2 megabytes in filesize
- Be less than about 2000px in the longest dimension
- Be in png format with a transparent background
- Have no text or icons incorporated (these will be added in with dynamically resizing ones later)
These are not hard and fast rules, but are good rules of thumb, and care should be taken when choosing outside of those guidelines.
For step by step instructions on how to upload and align your image in Mapiddiction, see How to use an image overlaid on a Google Map
Details and Explanations:
- Image geometry – The image must have “correct geometry”. It must overlay on top of a real map (like GoogleMaps) and have all the features line up. Mappidiction can resize and rotate the image to make it line up, but it cannot distort the image. A stylised representation like a train/rail map, or a map where corners or angles have been tweaked to look like they are 90 degree right angles cannot be used.
Often, the best way to start drawing your image is to screenshot the Googlemap of your venue, and draw your map in layers on top of it, so you know the shapes and proportions are all correct, and you can draw in your important features in the right places relative to each other.This stylised map cannot be overlaid onto a Google Map, because the geometry is wrong:

Southern Cross Station – Stylised Map, 90 degree orientation of rails, roads, and buildings
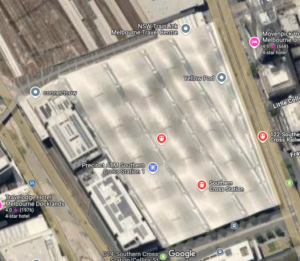
Southern Cross Station – real world shape and geometry, weird angles and rails not parallel with roads
-
Image formats – Mappidiction accepts images in webp, png, and jpeg format. Unless your map image is rectangular and oriented exactly north/south, you’ll want a transparent background to allow the Googlemap to show up underneath at the edges when it’s rotated. This means using webp or png formats. Jpg will produce smaller file sizes in many circumstances. especially when using “photographic” style images such as drone photography. “Posterized” images where everything is represented in block colours instead of smoothly changing colours or gradients can often compress remarkably well using png.
-
Image pixel size – The pixel dimensions limit the sharpness of the image when zoomed in, some pixellation will inevitably occur when zoomed right in. As a rule of thumb, a custom map typically has a maximum zoom level set so it displays an area about the size of a house or two, and some noticeable pixellation is expected at such high zoom levels.
-
Image file size – The image needs to be downloaded to view the map, so file size needs to be kept as small; as possible. 1 – 2 MB should be considered the maximum size for snappy performance on phones. This is a tradeoff between the image’s graphic design, the image format, the desired resolution when zoomed right in. Experimentation by exporting your image in a few different ways may be required to select the best compromise for your map.
- Zoom Levels – Maximum and minimum zoom levels for typical use cases and acceptable pixelation at max zoom need to be taken into account.
Zoom levels refer to how large (or small) an area the map displays. For Google Maps they range from 0 to about 21, where 21 shows about 2 typical house sized buildings, 16 or 17 shows about a whole suburb, and 12 displays large a city/metro area (like all of Melbourne or Sydney). Zoom Level 0 displays the whole world.
Depending on the detail in your image overlay and the size of the venue your map covers, relevant zoom levels will typically be from 17 (zoomed out to the show the surrounding suburb with your map in the middle) to 21 (zoomed down to so an area the size of a couple of houses fill the displayed map).
There is a tradeoff that needs to be made between image quality when zoomed right in and the file size of the whole image – which affects download times and performance. Usually you’ll need to accept some image degradation showing up as pixellation when zoomed right in, otherwise your image file may end up with too large a file size and will download slowly and panning and zooming around the map will perform poorly, particularly on lower end phones. - Image content – If you add text, labels, or icons to your map image, they’ll get bigger and smaller as the user zooms in and out on the map. It’s better to leave these details off the image and add them back later using the Mapiddiction tools. This way you will get readable sized text and usefully sized icons or marker pins at every zoom level. You can add marker pins with custom icons, text and labels, and even draw lines or polygons using the Mapiddiction tools, and these will always resize and draw properly as users zoom in and out.
- Image and map orientation and background transparency – For anything not exactly rectangular and NorthSouth/EastWest oriented, a transparent background (usually PNG) will work better than having odd edges in the Google Map overlay. This allows the map to transition between irregular outline of the custom image and the Google Map street map or satellite view underneath – as users pan or zoom past the edges of the custom image.

Image with non transparent background
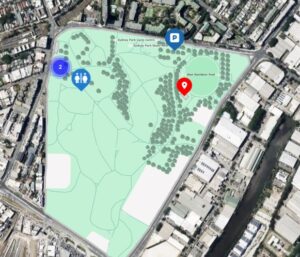
Image with transparent background
- Image alignment – The image is aligned to the underlying GoogleMap by selecting two points on the image and the same two points on the Google Map. These work best when they’re far apart and in “diagonal corners”, two points in a straight north/south or east/west orientation don’t work as well.
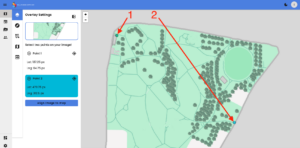
Alignment points in diagonal corners on image
When checking the alignment, care should be taken to ensure that relevant features where the edge of the image meets the underlying GoogleMap street or satellite view line up as expected. road/driveway entrances are usually important. The opacity slider can be used to see both the underlying GoogleMap and the semi-transparent version of your image, so you can confirm all relevant features line up well on both.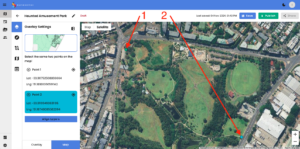
Matching diagonal alignement points on Google Map
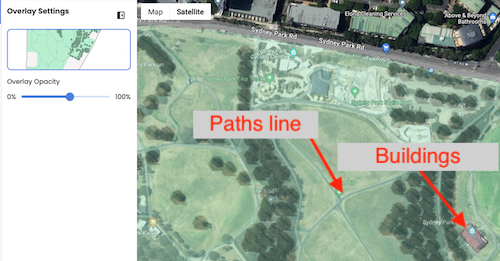
Check features like paths and buildings are aligned


